


Action Photography Guide
f/8 and be there! Tips and tricks for improving your photography.
Most cyclists on Otago’s Great Rides probably won’t be pulling wheelies or catching air over rock drops and for some, the most on-trail “action” might just be arguing over who pays for morning coffee…. But whether riding your bike at a leisurely pace on holiday or ripping down single track, everyone has a camera in their pockets these days, and the principles of capturing a great cycling photo are the same whether shooting on a smartphone or a top-of-the-line DSLR camera.
We asked Riley McLay, a renowned sports photographer based in Queenstown, for his top tips and tricks on how to capture great action photos whilst out riding the trails.
- words and pictures by Riley McLay
1. GET OUT THERE
f/8 and be there!*
Great photos are not captured from the couch! All the camera gear in the world is useless until you get outside and give it a go! Whether simply armed with a smartphone in your pocket or with a backpack full of fancy lenses, being in the right place at the right time is often the key to great photography. This applies as much to sports photography as it does to wildlife or landscape photography.
*Photographer jargon i.e. it’s more important to take the opportunity for a picture rather than being too concerned about using the best technique…
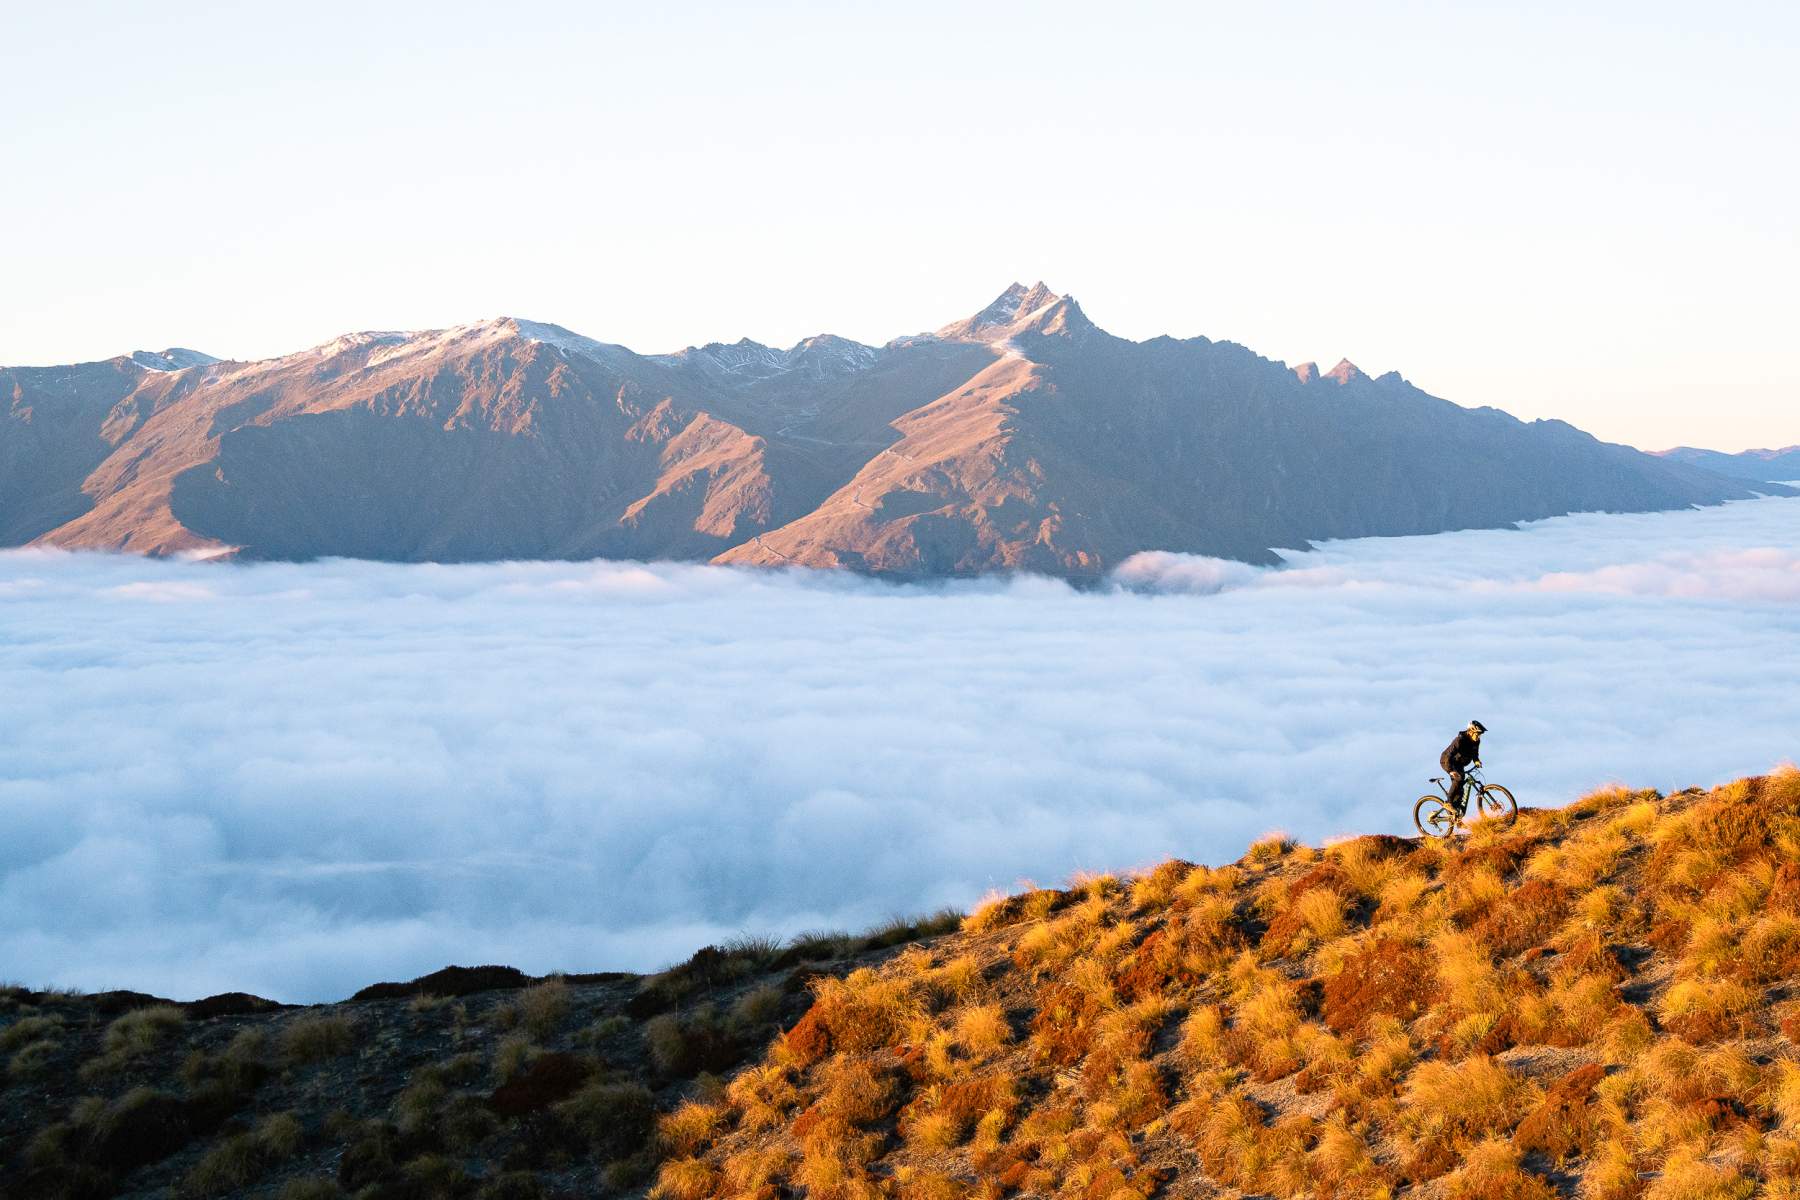
f/8 and be there.... a case in point! A gloomy day below the cloud in Queenstown but get off the couch and look what was to be found up in the hills.
Athletes and modelling talent.
Whilst most people on the trails will be riding with friends and family, aka their own ‘modelling talent’, if you’re a budding photographer and have no one to shoot, then just ask. The idea of going up to someone you've never met before and asking to take photos of them can be daunting, but you'll never know if you don't ask. Most of the time, athletes are always on the lookout on different ways they can promote themselves. A great way to start is by having a conversation with the athlete, proposing something like, "I'll take some photos of you, and in return, you can tag me on social media for exposure.” This is a great way to build a rapport with an athlete but also a good way to build upon your own portfolio.
Make a plan.
Come up with a rough idea of how you want your shoot to go. Where do you want to shoot? Who do you want to shoot? Is there a backdrop you want to incorporate into the shot? What lighting are you looking for? Making a plan takes a lot of the guesswork and potential stress out of the process while working towards a joint goal with your talent.
A photographer wears many hats.
You're the creative director, head of logistics, human relations, the list goes on…. The art of the best photographers in the world isn't how they can use a camera but the way they are able to balance and manipulate all the factors of a photoshoot to try and get the best results possible.
Make a plan - what's the weather forecast, travel logistics to the locations, and what about safety considerations?
As the photographer you need to balance all the variables to get a result... the light, the weather, your camera and the subjects!
Framing & Composition
Rules are made to be broken!
While there are endless composition strategies, at the end of the day, they’re just guidelines. Your unique style as a photographer emerges through how you choose to apply these elements to convey your vision in an image. Here are some of my favourite composition techniques which I often incorporate into my work.
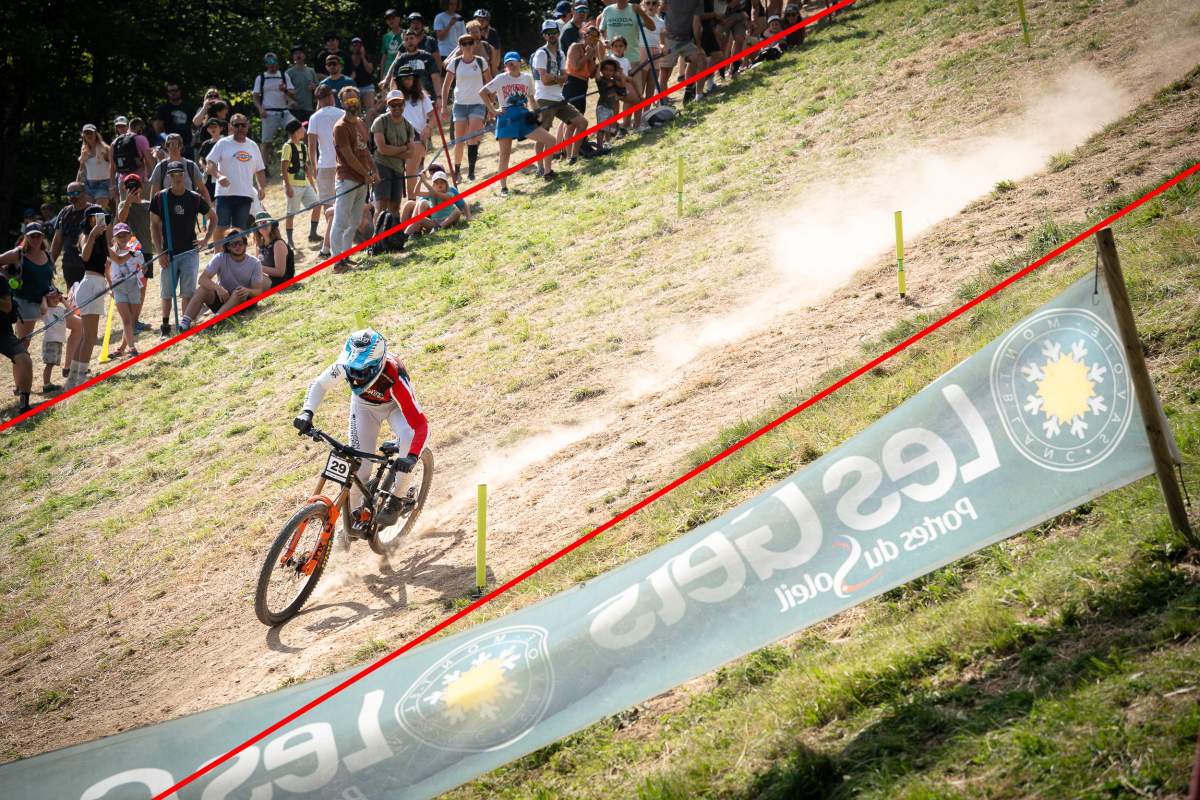
Rule of Thirds.
Divides an image into nine equal parts by two equally spaced horizontal and vertical lines. The main idea is to place key elements of your composition along these lines or at their intersections.

The rule of thirds with a grid overlay...

...the subject is in the top third of the frame on the vertical and horizontal axis.
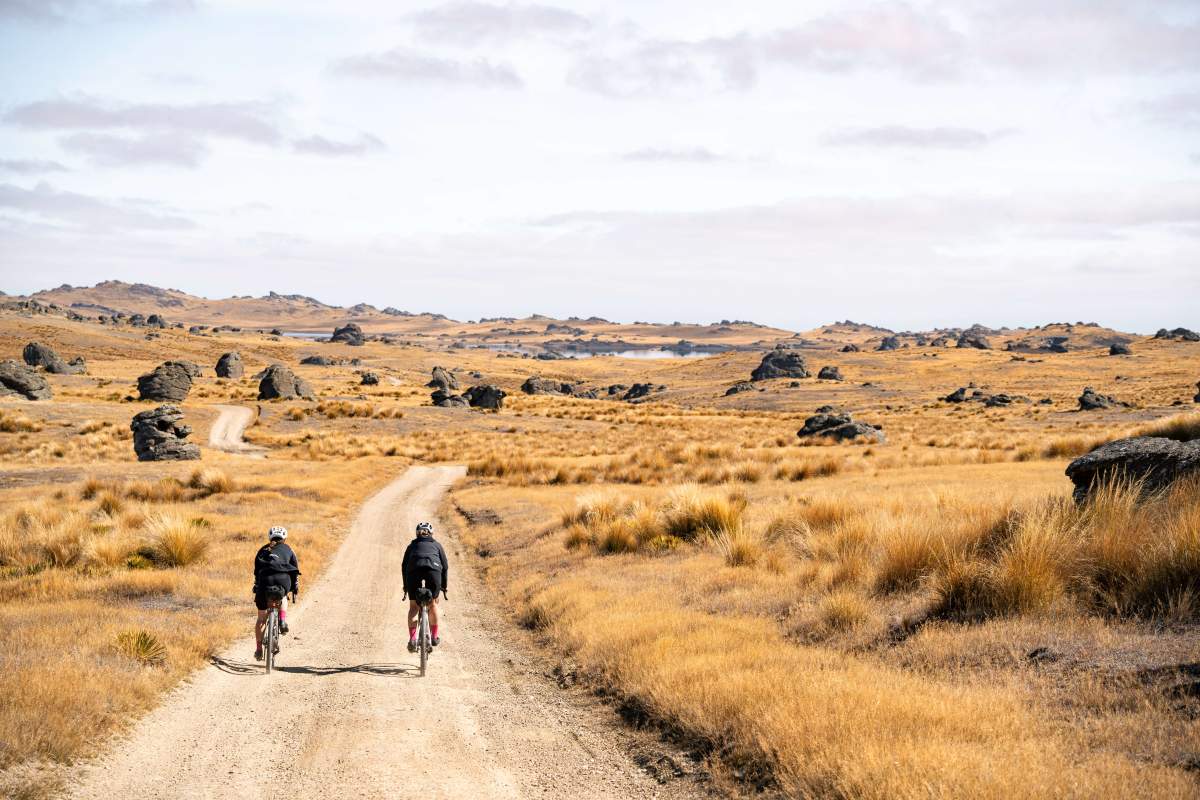
Leading Lines.
Guide the eye through the image, often towards the main subject or focal point. These lines can be anything from roads, rivers, fences, or even the edges of buildings. The key is that they naturally draw attention in a specific direction, creating a sense of depth and perspective.
Centring.
The subject at the centre of the composition creates a balanced image that naturally draws attention. This technique is particularly effective for symmetry, portraits, and minimalist scenes. However, it can feel static if used too frequently.
The dust trail and course markings are natural "leading lines" for your eyes to follow the biker.

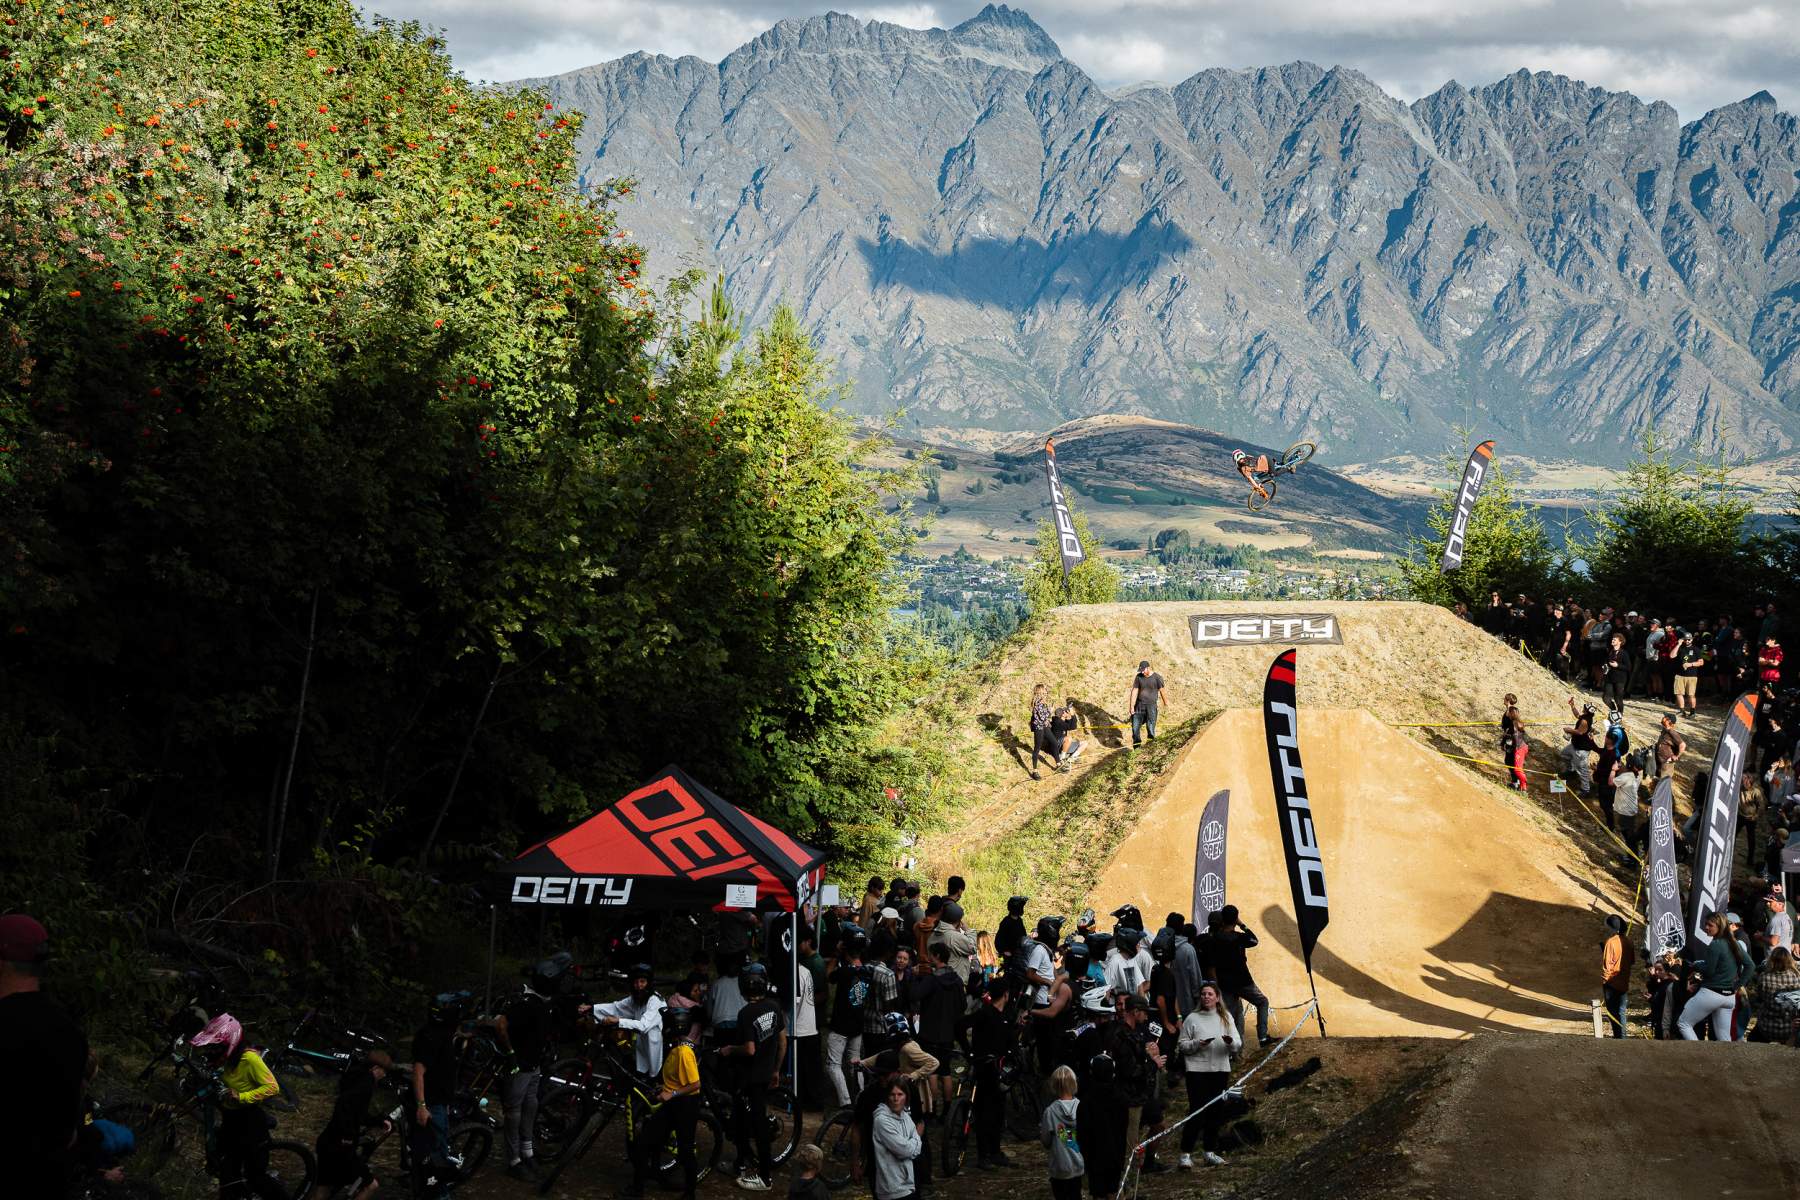
Centring - the airborne biker is at the centre of the composition.
Camera Settings
When it comes to settings, these are all dependent on the light you’re working with. Whether using a smartphone or the latest DSLR you’ll be trying to balance the exposure triangle to get the best result possible. The exposure triangle consists of three factors - shutter speed, aperture, and ISO.
Shutter Speed.
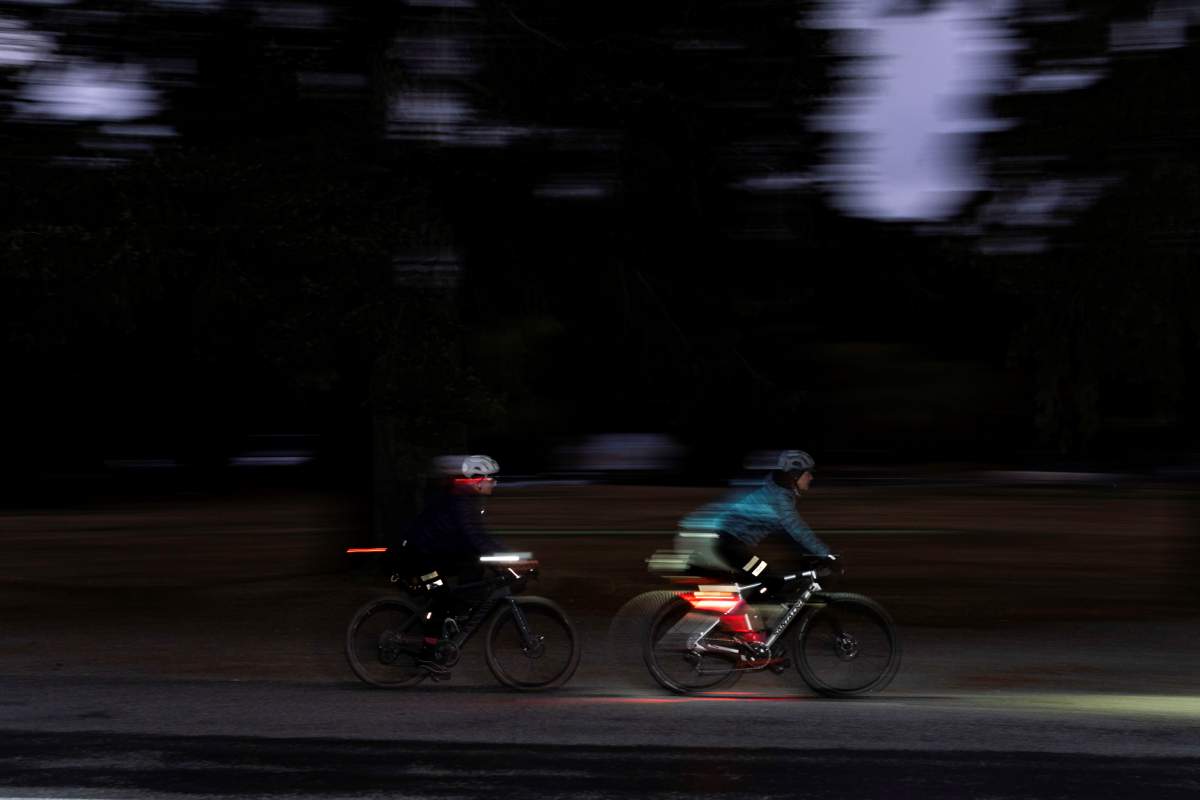
This is the length of time your camera's shutter is open, allowing light to hit the camera sensor and expose the image. The longer the shutter is open the more light is being exposed to the shutter, and vice versa. A fast shutter speed (e.g. 1/1000 of a second) effectively freezes fast-moving subjects in their tracks, preserving sharpness and detail. This method is used a lot in action sports or wildlife photography as the moments we want to capture are very brief. Another method that is also commonly used is using a slow shutter speed (e.g. 1/80 of a second). This is done with the goal of creating motion blur in an image to convey the movement.
A fun technique to play with at a slow shutter speed is panning. This technique combines a slow shutter speed with camera motion to create a sense of speed around a moving object. It’s a way to keep your subject in focus while blurring your background. This is also an easy technique to try with a smartphone camera using burst mode.
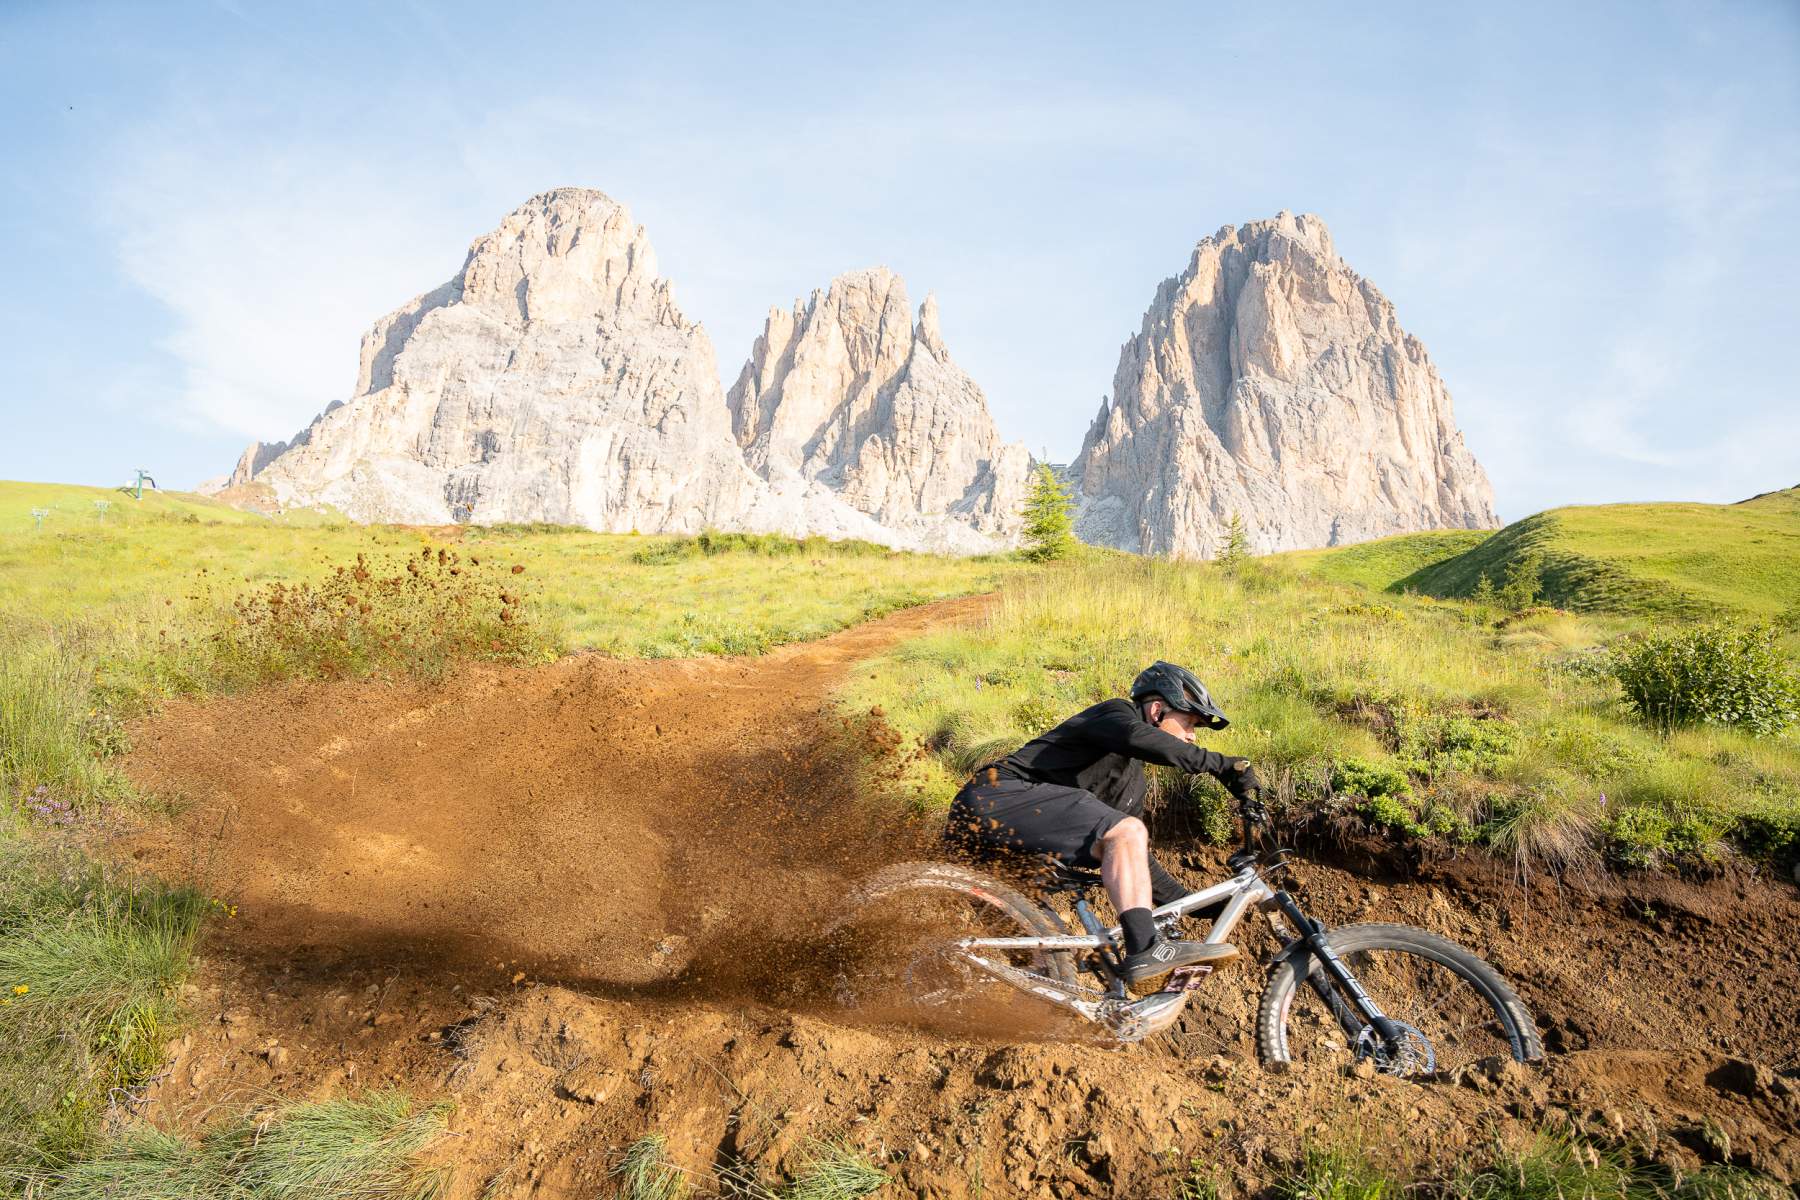
A fast shutter speed 'freezes' the action, so in this shot every molecule of dirt and dust is in sharp focus.
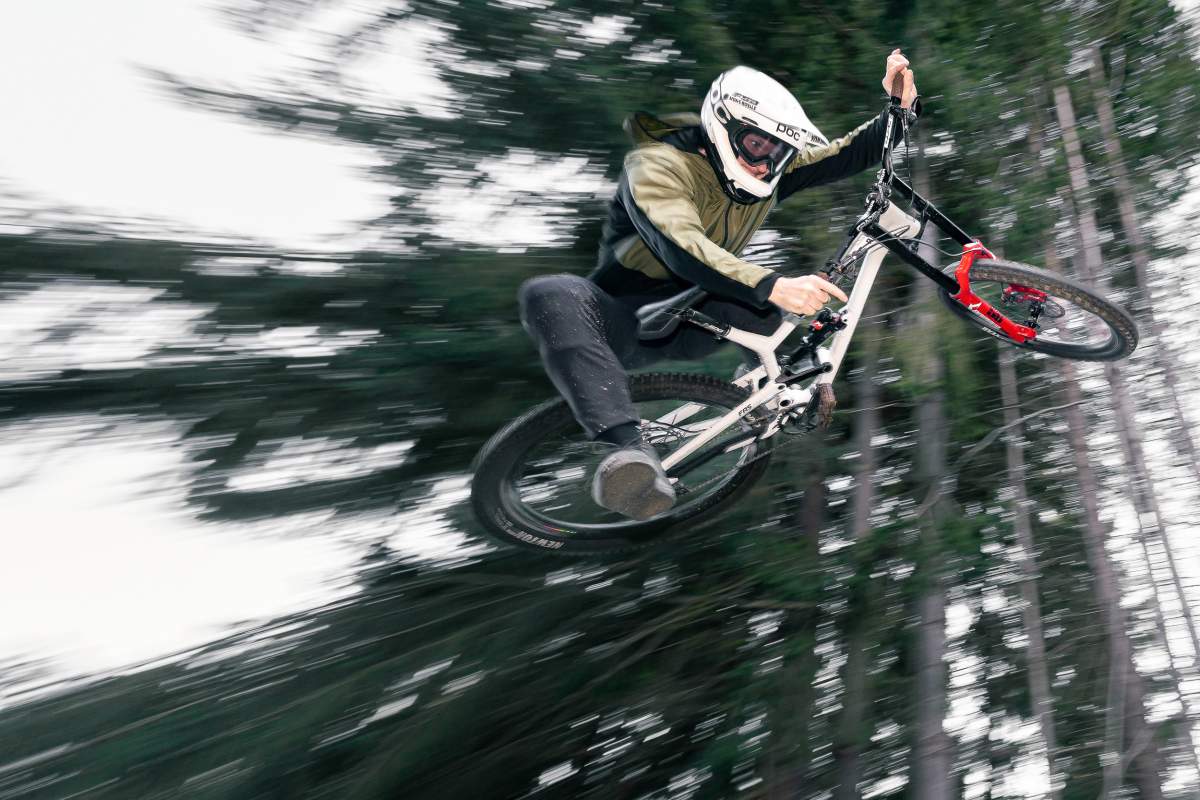
By panning with a slow shutter speed the subject remains in focus and the background blurred...
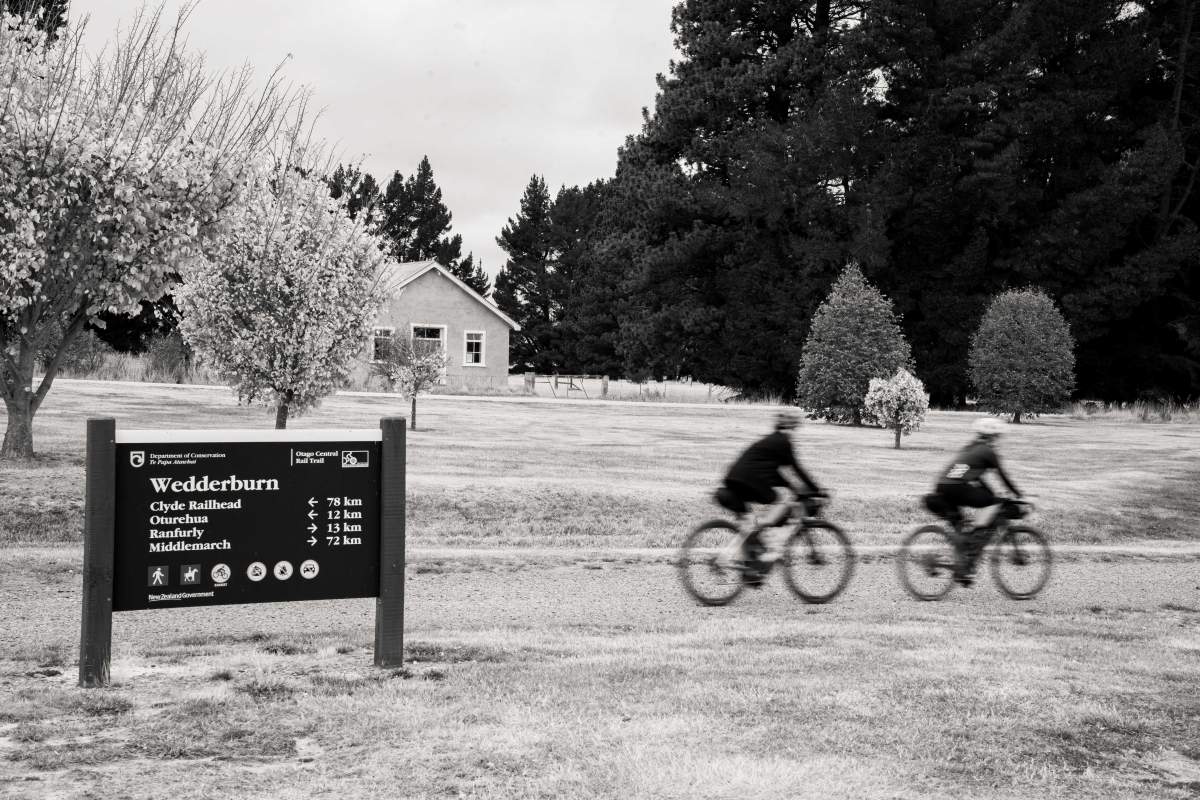
...but by remaining still with a slow shutter the moving subjects are blurred.
Aperture.
This refers to the opening in a camera lens through which light passes. It works a bit like the pupil of your eye. The size of the aperture is adjustable and is measured in f-stops. A lower f-stop number (e.g. f/2.8) means a larger aperture opening, allowing more light to hit the camera sensor. This is useful in low light situations (e.g. in a dark forest) as it is often difficult to keep a fast shutter speed without adjusting to a lower f-stop. A large aperture (low f-stop) also creates a shallow depth of field, meaning the background can be blurry while the subject is sharp. A higher f-stop number (e.g. f/16) means a smaller opening, letting in less light. A small aperture (high f-stop) creates a deep depth of field, keeping more of the scene in focus. This is commonly used with landscape styled images as you want to get your subject and the background looking as sharp as possible.
This is where the f/8 and be there mantra comes from. A basic f/8 aperture setting offers enough depth of field for most subjects. And then, the luck of being in the right place, at the right time and ready to shoot the action when it unfolds in front of your lens.
ISO.
ISO sensitivity is a standard set by the International Organisation for Standardisation. Basically, ISO measures the sensitivity of your camera’s sensor to light. A lower ISO number (like 100 or 200) means less light sensitivity, which is ideal for bright conditions. A higher ISO number (like 1600 or 3200) increases the sensitivity, allowing you to shoot in lower light conditions, but it also introduces more noise. Noise affects the brightness of an image and can give it a grainy texture.
Work with what you have!
The best approach is to master the camera setup you currently have. As your skills improve, you can work towards upgrading your equipment. Having fancy gear doesn't mean you can take a good photo, but it does help. The difference between an entry level camera and the top-of-the-line models are their features (burst rate, auto focus speed, low light performance).
A higher f-stop number (e.g. f/16) creates a deep depth of field, keeping more of the scene in focus.
EDITING
Smartphones have basic editing software built in which can help enhance photos, whereas professional editing software like Adobe Photoshop or Lightroom enables much more manipulation of an image, especially if captured in RAW format.
Photography is art, and art is subjective.
Editing is a powerful tool that can elevate a good image to greatness by enhancing its best qualities. However, if taken too far, it can distort the image, making it look unnatural or overdone. It is all dependent on what look you are going for and what ideas you want to convey with your images. A great edit (in my opinion) is subtle, bringing out its best qualities without making the edits obvious.
RAW vs JPEG.
This all depends on how much post editing you want to do. If you like the way your exposure looks straight out of the camera, stick with JPEG. RAW files capture all the data recorded by the camera's sensor without any compression or processing. Shooting in RAW allows you greater flexibility and control when editing their images. You can make more precise adjustments to exposure, white balance, colour, and detail without degrading the image quality. However, RAW files need to be processed and converted into more common formats like JPEG or TIFF for sharing or printing, as most devices and platforms cannot display them directly.
Tips for when you're shooting
Breathe and take your time!
In action sports, things move quickly, and it can be overwhelming to capture the shot you want. However, achieving the right composition and angle takes time and patience.
Burst Mode.
If you can, use your camera's burst mode (often referred to as high-speed continuous shooting) to reduce the risk of missing the perfect moment when your subject is in the ideal position. The offset of this as you may have a few more shots to sort through but it is better than missing the shot.
What's the story behind the photo?
Focus on trying to tell the story of the experience rather than focusing on a single hero shot. The best photos are normally the ones you don't expect and the more candid moments often that tell a deeper story. Keep an open mind.
The LCD screen is probably lying to you!
When you're on location, everything might look perfect on the camera's LCD screen, with all those megapixels compressed into that tiny display. However, once you get home and view the images on a larger screen, they might be out of focus, too bright or dark, or lack sharpness. While editing can help, it can only do so much to fix these issues. That's why it's crucial to get as many fundamentals right in-camera as possible.
Be nice and be safe.
In action sports photography there is normally an element of danger involved and the key is to find the perfect balance of getting the most of your subject while not pushing them in a direction where they are going to hurt themselves. Likewise, don’t risk life and limb by putting yourself in a dangerous situation just for a photograph.
Say “g’day’!
From my experience, photographers might not always seem the most approachable at events or out in the field. This is often because they're focused on getting their own shots. However, most photographers are usually up for a chat and love to talk shop, especially since we often work alone.

Bingo! When planning, framing, timing, skill, practice and a modicum of good luck align!
About Riley


Riley McLay is a freelance photographer based in Queenstown, New Zealand. He has a passion for the outdoors which drives a unique perspective in action and adventure photography. Born and raised in the Southern Alps, Riley's work is inspired by nature and the thrill-seekers who explore it. To see more of Riley’s work, check out his website below, or follow him on Instagram, @riley_mclay

Related Stories
-

Otago's Signature Tracks
Best short rides on the Queenstown Trails
Read more about Otago's Signature Tracks -
Otago's Classic Hits
Highlights of the Otago Central Rail Trail and Lake Dunstan Trail
Read more about Otago's Classic Hits -
Otago’s Greatest Hits
Highlights of the Clutha Gold and Roxburgh Gorge Trails
Read more about Otago’s Greatest Hits -
Reclaiming Wild
Two gutsy girls on an epic bikepacking mission to celebrate their 50th birthdays.
Read more about Reclaiming Wild -
Otago Central Rail Trail Pub Guide
A guide to the pubs along the Otago Central Rail Trail
Read more about Otago Central Rail Trail Pub Guide


